Quick Start
Bottom line.
- Go to here, type your message, click ‘Enter’
- That’s really all there is to it to get up and running with SpeechNinja. Want to know more, find out some tips? Keep reading.
Get to know the app’s parts
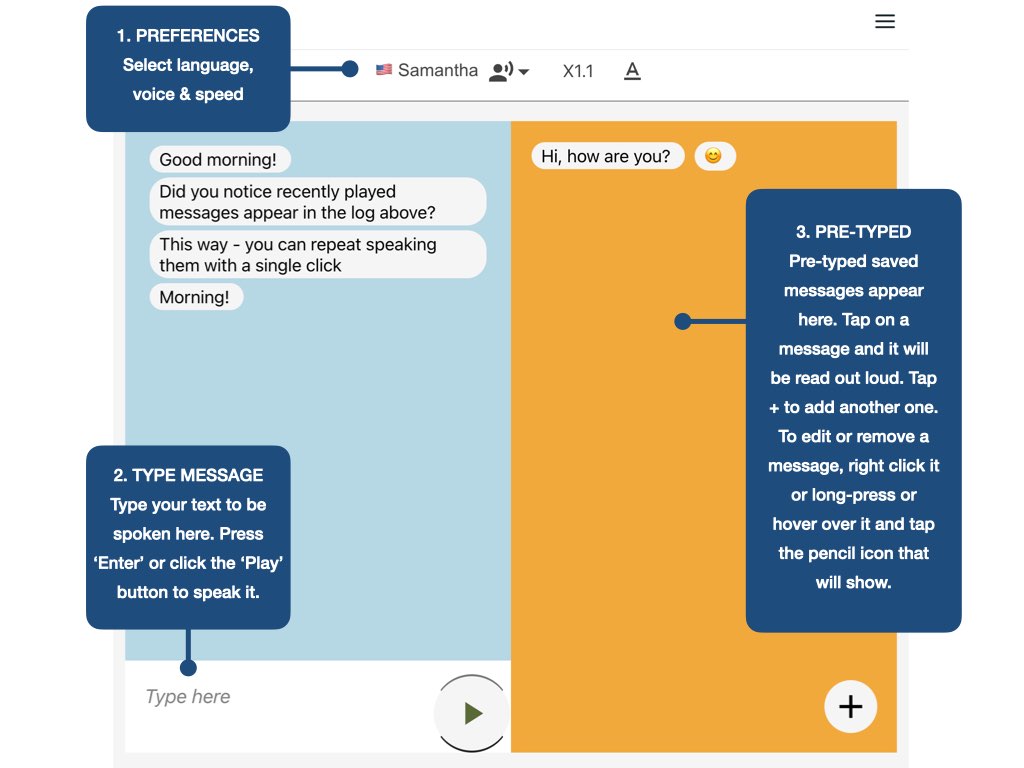
1. PREFERENCES BAR
Select language,voice & speed. Tip: when using a Firefox browser on Windows devices, you can select locally installed SAPI5 voices, including your own voice if you have installed it.
2. MESSAGE INPUT AREA
This is where you freely type your text to be spoken. Press ‘Enter’ or click the ‘Play’ button to speak it. Spoken text will be cleared from the input area automatically so it is ready for the next text input. Recent messages bubble up to the ‘recent messages’ feed, so you can repeat them.
3. PRE-TYPED MESSAGES.
Pre-typed saved messages appear here. Tap on a message and it will be read out loud. Tap + to add another one. To edit or remove a message, right click it or long-press or hover over it and tap the pencil icon that will show.